Making Simple Server
ping 서버부터 만들기.
출처: 어떤 flask책인데 제목(백엔드어쩌고)을 까먹었네요. 나중에 업데이트하죠.ㅜㅜ
ping을 보내면 pong이라고 대답하는 서버를 만들고자 한다. flask를 사용할 것이다.
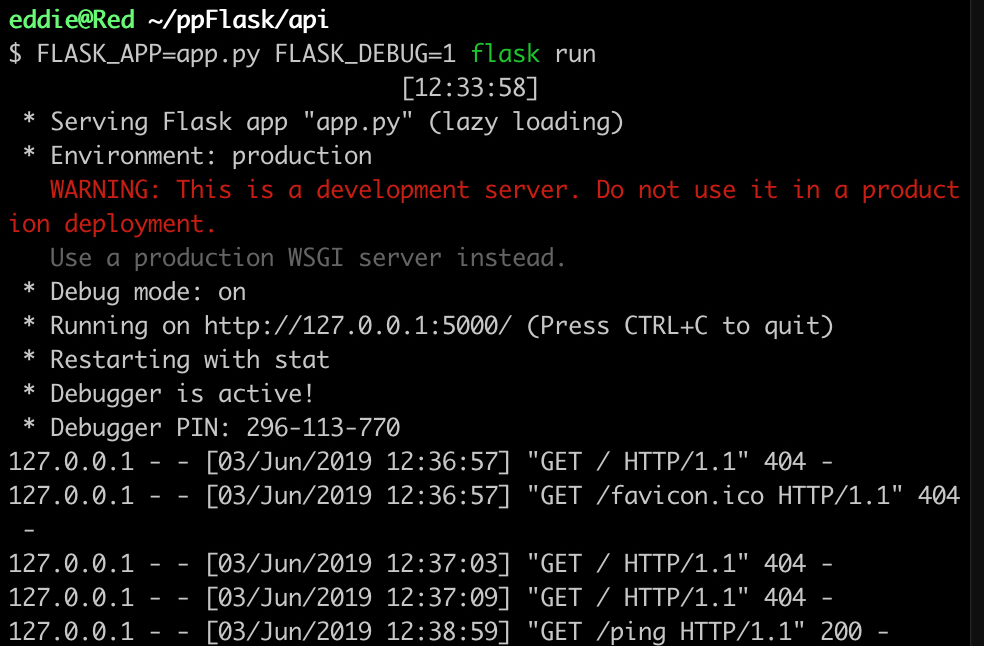
가장 기본적인 Ping서버 만드는 코드는 다음과 같다.
from flask import Flask

app = Flask(__name__)

@app.route("/ping", methods = ['GET'])
def ping():
    return "pong"
터미널에서 아래처럼 입력하면 ping 서버가 응답합니다.
$ http -v GET http://localhost:5000/ping
핑을 보낸화면
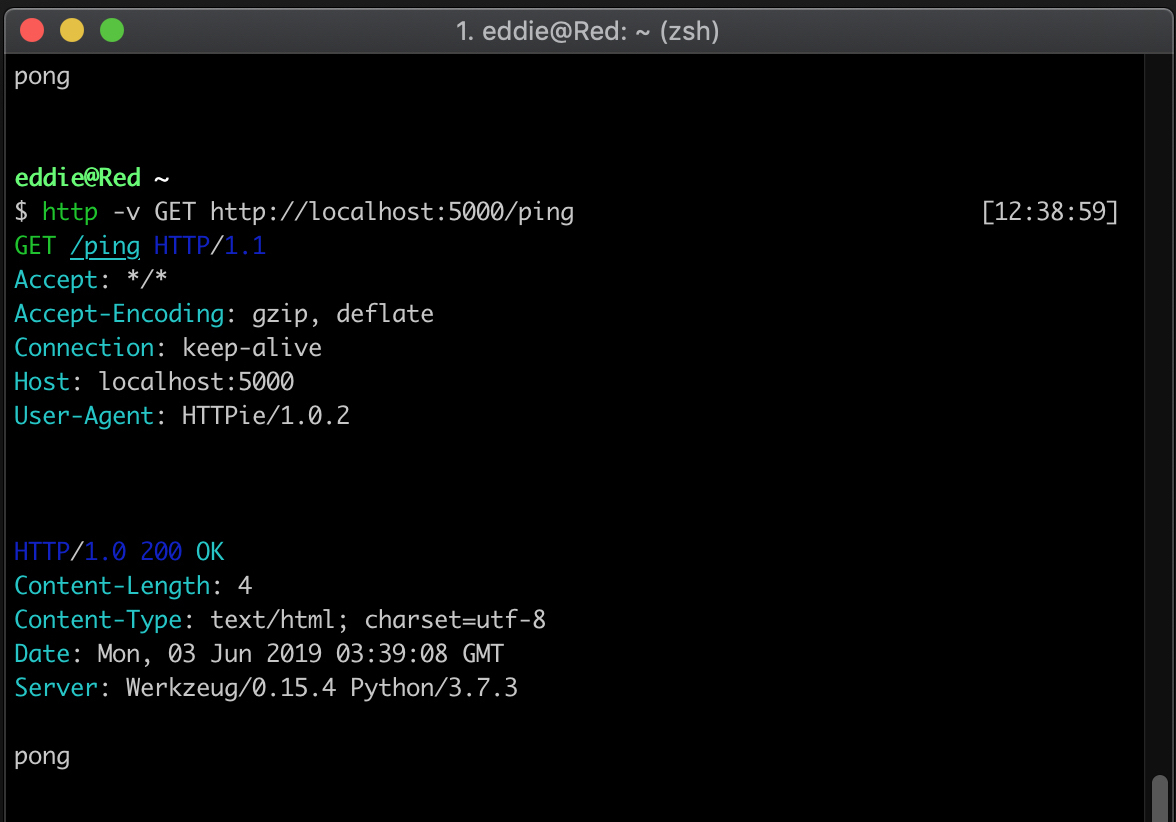
응답화면
회원가입 기능 추가한 코드
from flask import Flask, jsonify, request

app = Flask(__name__)
app.users = {}
app.id_count = 1  #새 사용자가 회원가입할 때마다 증가

@app.route("/ping", methods = ['GET'])
def ping():
    return "pong"

@app.route("/sign-up", methods=['POST']) #포스트 임을 주의
def sign_up():
    new_user        = request.json
    # request는 endpoint에 전송된 해당 HTTP요청을 통해 전송된 json데이터를 파이썬 딕셔너리로 변환해준다.
    new_user["id"]  = app.id_count
    app.users[app.id_count] = new_user # 딕셔너리에 사용자 정보를 저장해줌
    app.id_count    = app.id_count + 1 #

    return jsonify(new_user) # dictionary를 json으로 변환해줌.
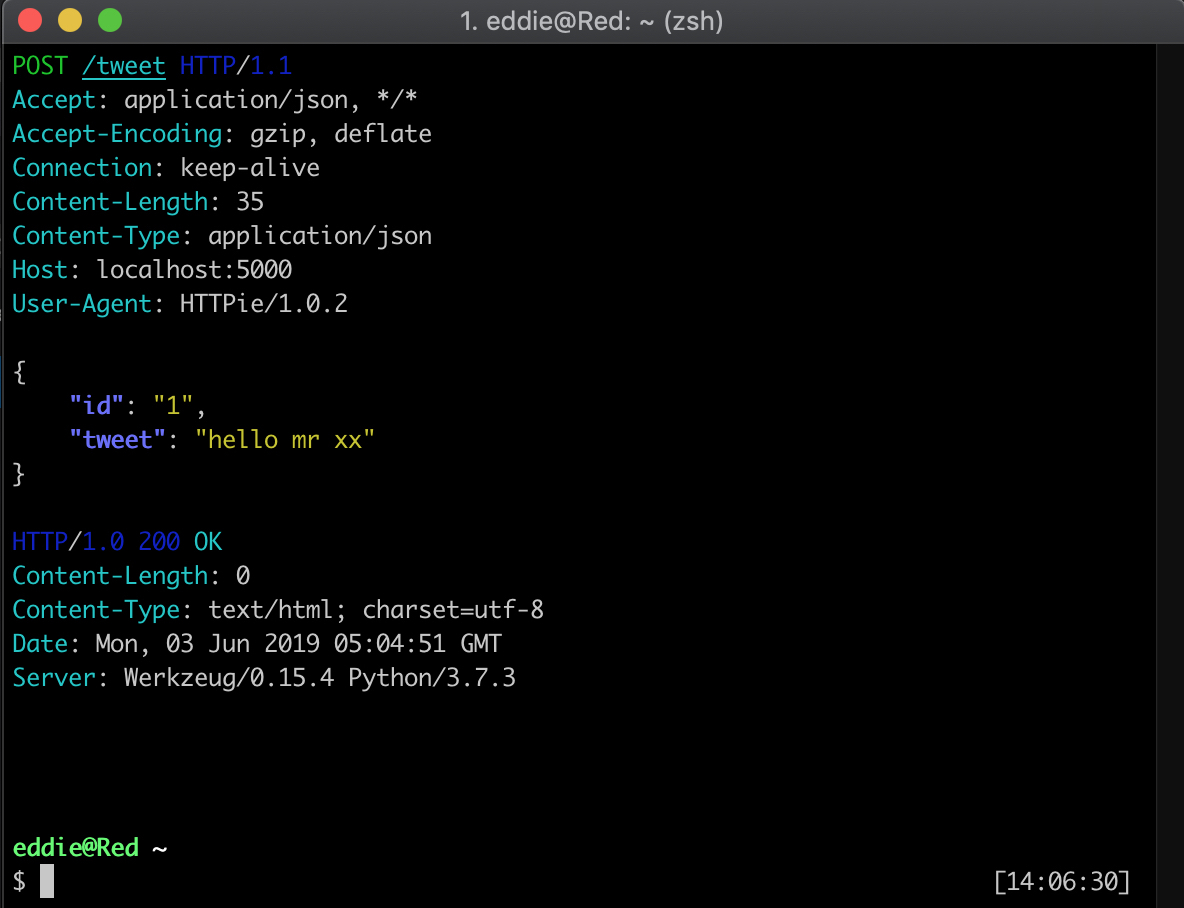
이번에는 트위터 내용을 보내는 기능을 추가한다
기존 소스에 아래 내용만 덧붙인다
# 트윗 저장소를 만듬 ------------------------------------
app.tweets = []

@app.route("/tweet", methods=['POST'])
def tweet():
    payload = request.json
    user_id = int(payload['id'])
    tweet_content = payload['tweet']

    if user_id not in app.users:
        return "그런 사용자가 존재하지 않네요", 400

    if len(tweet_content) > 300:
        return "300자 초과했어요", 400

    user_id = int(payload['id'])
    app.tweets.append({
        'user_id': user_id,
        'tweet'  : tweet
    })
    return '', 200
실행
이때 주의할 점은 가입절차부터 다시 해야 한다는 것이다. 서버가 다시 실행되면서 기존 id=1인 사용자가 지워졌기 때문이다.
이제 follow 기능추가
follow기능을 추가하려면 아래 처럼 작성한다
@app.route("/follow", methods=['POST'])
def follow():
    payload=request.json
    user_id = int(payload['id'])
    user_toFollow = int(payload['id_follow'])

    if user_id not in app.users:
        return "그런 사용자 없습니다", 400
    if user_toFollow not in app.users:
        return "그런 사용자 없습니다", 400

    login_user = app.users[user_id]  # 기존 사용자 데이터를 읽어 들임.
    login_user.setdefault('follow',set()).add(user_toFollow)
    return jsonify(login_user)
실행하니 아래 처럼 에러가 발생한다. Set 타입을 적절하게 처리하지 못하기 때문임.
.
.
    return _json.JSONEncoder.default(self, o)
  File "/Users/eddie/miniconda3/envs/api/lib/python3.7/json/encoder.py", line 179, in default
    raise TypeError(f'Object of type {o.__class__.__name__} '
TypeError: Object of type set is not JSON serializable

-->
아래 코드를 추가한후 재 실행하자
from flask.json import JSONEncoder

class CustomJSONEncoder(JSONEncoder):
    def default(self, obj): #default method를 over write 함.
        if isinstance(obj, set): #set타입이라면 list로 변환한다.
            return list(obj)
        return JSONEncoder.default(self, obj)
app.json_encoder = CustomJSONEncoder
타임라인 추가
아래 코드를 보자.
특히 여기서는 <int:user_id>라는 명령어가 보임. “Timeline/1” 일 때 user_id에 1이 int 값으로 들어가는 것임. 이것을 def timeline(user_id) 함수의 user_id에서 사용하게 된다.
전체코드는 다음과 같다. 단 timeline에 에러가 있음.ㅜㅜ.
from flask import Flask, jsonify, request

app = Flask(__name__)
app.users = {}
app.id_count = 1        #새 사용자가 회원가입할 때마다 증가

@app.route("/ping", methods = ['GET'])
def ping():
    return "pong"

# 회원 가입 데코레이터 부분 ------------------------------------
@app.route("/sign-up", methods=['POST']) #포스트 임을 주의
def sign_up():
    new_user        = request.json  # request는 endpoint에 전송된 해당 HTTP요청을 통해 전송된 json데이터를 파이썬 딕셔너리로 변환해준다.
    new_user["id"]  = app.id_count
    app.users[app.id_count] = new_user # 딕셔너리에 사용자 정보를 저장해줌
    app.id_count    = app.id_count + 1 #

    return jsonify(new_user) # dictionary를 json으로 변환해줌.

# 트윗 저장소를 만듬 ------------------------------------
app.tweets = []

@app.route("/tweet", methods=['POST'])
def tweet():
    payload = request.json
    user_id = int(payload['id'])
    tweet_content = payload['tweet']

    if user_id not in app.users:
        return "그런 사용자가 존재하지 않네요", 400

    if len(tweet_content) > 300:
        return "300자 초과했어요", 400

    user_id = int(payload['id'])
    app.tweets.append({
        'user_id': user_id,
        'tweet'  : tweet
    })
    return '', 200
# follow 하는 함수 추가 ------------------------------------
@app.route("/follow", methods=['POST'])
def follow():
    payload=request.json
    user_id = int(payload['id'])
    user_toFollow = int(payload['id_follow'])

    if user_id not in app.users:
        return "그런 사용자 없습니다", 400
    if user_toFollow not in app.users:
        return "그런 사용자 없습니다", 400

    login_user = app.users[user_id]  # 기존 사용자 데이터를 읽어 들임.
    login_user.setdefault('follow',set()).add(user_toFollow)
    return jsonify(login_user)


from flask.json import JSONEncoder

class CustomJSONEncoder(JSONEncoder):
    def default(self, obj): #default method를 over write 함.
        if isinstance(obj, set): #set타입이라면 list로 변환한다.
            return list(obj)
        return JSONEncoder.default(self, obj)
app.json_encoder = CustomJSONEncoder

# unfollow 하는 함수 추가 ------------------------------------
@app.route("/unfollow", methods=['POST'])
def unfollow():
    payload=request.json
    user_id = int(payload['id'])
    user_toUnfollow = int(payload['id_follow'])

    if user_id not in app.users:
        return "그런 사용자 없습니다", 400
    if user_toUnfollow not in app.users:
        return "그런 사용자 없습니다", 400

    login_user = app.users[user_id]  # 기존 사용자 데이터를 읽어 들임.
    login_user.setdefault('follow',set()).discard(user_toFollow)
    return jsonify(login_user)

# timeline 함수 추가 ------------------------------------

@app.route('/timeline/<int:user_id>',methods = ['GET'])
def timeline(user_id):
    if user_id not in app.users:
         return "그런 사용자 없습니다", 400
    follow_list = app.users[user_id].get('follow',set())
    follow_list.add(user_id)
    timeline = [tweet for tweet in app.tweets if tweet['user_id'] in follow_list]

    return jsonify({
        'user_id': user_id,
        'timeline': timeline
    })
mysql installation
설치는 다 했는데 아래 과정에서 에러가 발생할수 있다.
$ mysql_secure_installation                                                                                                               [16:54:35]

Securing the MySQL server deployment.

Enter password for user root:
Error: Can't connect to local MySQL server through socket '/tmp/mysql.sock' (2)
이는 다음 코드로써 해결가능하다
sudo mkdir /var/mysql
sudo ln -s /tmp/mysql.sock /var/mysql/mysql.sock
이후 다시 터미널에서 비밀번호를 설정하자
$ mysql_secure_installation
참고 사이트: https://ssumer.com/qa-맥북-mysql-구동이-안되요/
이제 mysql -u root -p명령어를 실행해보자.
$ mysql -u root -p                                                                                                                                                                                [17:17:12]
Enter password:
Welcome to the MySQL monitor.  Commands end with ; or \g.
Your MySQL connection id is 12
Server version: 8.0.16 Homebrew

Copyright (c) 2000, 2019, Oracle and/or its affiliates. All rights reserved.

Oracle is a registered trademark of Oracle Corporation and/or its
affiliates. Other names may be trademarks of their respective
owners.

Type 'help;' or '\h' for help. Type '\c' to clear the current input statement.

mysql>
이제 추가로 필요한 아래 패키지를 각각 설치하자
$ pip install sqlalchemy
$ pip install mysql-connector-python
config.py
아래 코드를 저장하자.
db = {
    'user':'root',
    'password':'test1234',
    'host': 'localhost',
    'port': 3306,
    'database': 'miniter'
}
DB_URL = f"mysql+mysqlconnector://{db['user']}:{db['password']}@{db['host']}:{db['port']}/{db['database']}?charset=utf8"
app.py수정
아래 처럼 수정한다.
from flask import Flask, jsonify, request
from sqlalchemy import create_engine, text #추가한부분.

def create_app(test_config = None):
    app = Flask(__name__)

    if test_config is None:
        app.config.from_pyfile("config.py") #unittest 하는 경우가 아니라면 config.py를 읽는다.
    else:
        app.config.update(test_config)

    database = create_engine(app.config['DB_URL'], encoding = 'utf-8', max_overflow = 0) #sqlAlchemy사용하는 부분임.
    app.database = database #생성한 Engine 객체를 플라스크 객체에 저장함. 이로써 현재 .py파일에서 데이터 베이스 접근이 가능함.

    return app
회원가입을 Database로 하기
app소스 - 우선 돌아가는것만 확인했음.
전체 소스중에 필요 부분만 남기고 삭제필요함.
from flask import Flask, jsonify, request, current_app
from flask.json import JSONEncoder
from sqlalchemy import create_engine, text

class CustomJSONEncoder(JSONEncoder):
    def default(self, obj): #default method를 over write 함.
        if isinstance(obj, set): #set타입이라면 list로 변환한다.
            return list(obj)
        return JSONEncoder.default(self, obj)

#app.json_encoder = CustomJSONEncoder

def create_app(test_config = None): #flask가 자동으로 이 함수를 인식함. 또한 test_config라는 인자를 받아 유닛테스트때 사용.
    app = Flask(__name__)
    app.json_encoder = CustomJSONEncoder
    if test_config is None:
        app.config.from_pyfile("config.py") #unittest 하는 경우가 아니라면 config.py를 읽는다.
    else:
        app.config.update(test_config)

    database = create_engine(app.config['DB_URL'], encoding = 'utf-8', max_overflow = 0) #sqlAlchemy사용하는 부분임.
    app.database = database #생성한 Engine 객체를 플라스크 객체에 저장함. 이로써 현재 .py파일에서 데이터 베이스 접근이 가능함.

    return app

app = create_app()

@app.route("/ping", methods = ['GET'])
def ping():
    return "pong"

# 회원 가입 데코레이터 부분 ------------------------------------
@app.route("/sign-up", methods=['POST']) #포스트 임을 주의
def sign_up():
    new_user        = request.json  # request는 endpoint에 전송된 해당 HTTP요청을 통해 전송된 json데이터를 파이썬 딕셔너리로 변환해준다.
    new_user_id = app.database.execute(text("""
    INSERT INTO users(
        name,
        email,
        profile,
        hashed_password
    ) VALUES(
        :name,
        :email,
        :profile,
        :password
    )
     """), new_user).lastrowid

    row = current_app.database.execute(text("""
        SELECT
            id,
            name,
            email,
            profile
        FROM users
        WHERE id = :user_id
    """),{
        'user_id': new_user_id
    }).fetchone()

    created_user = {
        'id'      : row['id'],
        'name'    : row['name'],
        'email'   : row['email'],
        'profile' : row['profile']
    } if row else None

    return jsonify(created_user) # dictionary를 json으로 변환해줌.
가입을 해 본다
$ http -v POST http://localhost:5000/sign-up name=hallo email=halloX@gmail.com password=test1234 profile="Halo test profile"
다음은 tweet을 날려보는 함수를 database를 사용하도록 수정해본다
# 트윗 저장소를 만듬 ------------------------------------

@app.route("/tweet", methods=['POST'])
def tweet():
    user_tweet = request.json
    tweet_content = user_tweet['tweet']

    if len(tweet_content) > 300:
        return "300자 초과했어요", 400

    app.database.execute(text("""
    INSERT INTO tweets(
        user_id,
        tweet
    ) VALUES(
        :id,
        :tweet
    )
     """), user_tweet)
    return '', 200
셸에 다음과 같이 트윗을 날려본다
$ http -v POST http://localhost:5000/tweet id=2 tweet="hello tweet world again with number2"
타임라인을 추가한다.
 # Timeline 을 보여줌 ------------------------------------

@app.route('/timeline/<int:user_id>',methods = ['GET'])
def timeline(user_id):
    rows = app.database.execute(text("""
         SELECT
            t.user_id,
            t.tweet
        FROM tweets t
        LEFT JOIN users_follow_list ufl ON ufl.user_id = :user_id
        WHERE t.user_id = :user_id
        OR t.user_id = ufl.follow_user_id
    """), {
        'user_id' : user_id
    }).fetchall()

    timeline = [{
        'user_id': row['user_id'],
        'timeline': row['tweet']
    } for row in rows]

    return jsonify({
        'user_id': user_id,
        'timeline': timeline
    })
이번 명령어는 get이다.
$ http -v GET http://localhost:5000/timeline/1
결과
HTTP/1.0 200 OK
Content-Length: 191
Content-Type: application/json
Date: Tue, 04 Jun 2019 09:19:39 GMT
Server: Werkzeug/0.15.4 Python/3.7.3

{
    "timeline": [
        {
            "timeline": "hello tweet world",
            "user_id": 1
        },
        {
            "timeline": "hello tweet world again",
            "user_id": 1
        }
    ],
    "user_id": 1
}
또 http -v GET http://localhost:5000/timeline/2의 결과는 다음과 같다.
$ http -v GET http://localhost:5000/timeline/2                                                                         [9:11:23]
GET /timeline/2 HTTP/1.1
Accept: */*
Accept-Encoding: gzip, deflate
Connection: keep-alive
Host: localhost:5000
User-Agent: HTTPie/1.0.2

HTTP/1.0 200 OK
Content-Length: 131
Content-Type: application/json
Date: Wed, 05 Jun 2019 00:11:36 GMT
Server: Werkzeug/0.15.4 Python/3.7.3

{
    "timeline": [
        {
            "timeline": "hello tweet world again with number2",
            "user_id": 2
        }
    ],
    "user_id": 2
}
현재까지의 전체 코드를 한번 보자.
from flask import Flask, jsonify, request, current_app
from flask.json import JSONEncoder
from sqlalchemy import create_engine, text

class CustomJSONEncoder(JSONEncoder):
    def default(self, obj): #default method를 over write 함.
        if isinstance(obj, set): #set타입이라면 list로 변환한다.
            return list(obj)
        return JSONEncoder.default(self, obj)

def create_app(test_config = None): #flask가 자동으로 이 함수를 인식함. 또한 test_config라는 인자를 받아 유닛테스트때 사용.
    app = Flask(__name__)
    app.json_encoder = CustomJSONEncoder
    if test_config is None:
        app.config.from_pyfile("config.py") #unittest 하는 경우가 아니라면 config.py를 읽는다.
    else:
        app.config.update(test_config)

    database = create_engine(app.config['DB_URL'], encoding = 'utf-8', max_overflow = 0) #sqlAlchemy사용하는 부분임.
    app.database = database #생성한 Engine 객체를 플라스크 객체에 저장함. 이로써 현재 .py파일에서 데이터 베이스 접근이 가능함.

    # 모든 데코레이터 & 함수들은  create_app 내부에 정의함 ( 이하 )
    @app.route("/ping", methods = ['GET'])
    def ping():
        return "pong"

    # 회원 가입 데코레이터 부분 ------------------------------------
    @app.route("/sign-up", methods=['POST']) #포스트 임을 주의
    def sign_up():
        new_user        = request.json  # request는 endpoint에 전송된 해당 HTTP요청을 통해 전송된 json데이터를 파이썬 딕셔너리로 변환해준다.
        new_user_id = app.database.execute(text("""
        INSERT INTO users(
            name,
            email,
            profile,
            hashed_password
        ) VALUES(
            :name,
            :email,
            :profile,
            :password
        )
        """), new_user).lastrowid

        row = current_app.database.execute(text("""
            SELECT
                id,
                name,
                email,
                profile
            FROM users
            WHERE id = :user_id
        """),{
            'user_id': new_user_id
        }).fetchone()

        created_user = {
            'id'      : row['id'],
            'name'    : row['name'],
            'email'   : row['email'],
            'profile' : row['profile']
        } if row else None

        return jsonify(created_user) # dictionary를 json으로 변환해줌.

    # 트윗 저장소를 만듬 ------------------------------------

    @app.route("/tweet", methods=['POST'])
    def tweet():
        user_tweet = request.json
        tweet_content = user_tweet['tweet']

        if len(tweet_content) > 300:
            return "300자 초과했어요", 400


        app.database.execute(text("""
        INSERT INTO tweets(
            user_id,
            tweet
        ) VALUES(
            :id,
            :tweet
        )
        """), user_tweet) #sql 문을 통해 insert될 트윗 데이터는 HTTP요청을 통해 전송된 JSON데이터 그대로 사용함.
        return '', 200

    # Timeline 을 보여줌 ------------------------------------

    @app.route('/timeline/<int:user_id>',methods = ['GET'])
    def timeline(user_id):
        rows = app.database.execute(text("""
            SELECT
                t.user_id,
                t.tweet
            FROM tweets t
            LEFT JOIN users_follow_list ufl ON ufl.user_id = :user_id
            WHERE t.user_id = :user_id
            OR t.user_id = ufl.follow_user_id
        """), {
            'user_id' : user_id
        }).fetchall()

        timeline = [{
            'user_id': row['user_id'],
            'timeline': row['tweet']
        } for row in rows]

        return jsonify({
            'user_id': user_id,
            'timeline': timeline
        })

    # 명령 : http -v GET http://localhost:5000/timeline/1

    return app #end of create_app
follow 와 unfollow 추가하기
기존 기능들 또 update하자.
    @app.route('/follow', methods =['POST'])
    def follow():
        jsonContent = request.json
        app.database.execute(text("""
            INSERT INTO users_follow_list(
                user_id,
                follow_user_id
            ) VALUES(
                :id,
                :follow
            )

        """), jsonContent)
        return '', 200
##bcrypt
사용
$ python
>>> import bcrypt
>>> bcrypt.hashpw(b"secrete passxx", bcrypt.gensalt())
b'$2b$12$/gjzWytxjesc25v9u0zfDeipVNFB7agaxrK1ZpUvN2skKumjL6FyO'
>>> bcrypt.hashpw(b"secrete passxx", bcrypt.gensalt()).hex()
'2432622431322432433731615330655a655a535a2f5a55326b464252655451707a4e512f765632454e6c785938384364616756554f63484b51536543'
JWT
PyJWT설치후 시험
>>> import jwt
>>> data_to_encode = {'hello':'payload'} #딕셔너리형태 주의바람
>>> encryption_secret = 'secret'
>>> algo = 'HS256'#JWT의 signature부분을 암호화할 때 사용할 암호 알고리즘 지정.
>>> encoded = jwt.encode(data_to_encode, encryption_secret, algorithm=algo)
확인
b'eyJ0eXAiOiJKV1QiLCJhbGciOiJIUzI1NiJ9.eyJoZWxsbyI6InBheWxvYWQifQ.rWCdlaDThW1XjJqfPtf8SqUGZ100YatqqYgRrz2kpPE'
다시 디코딩해보면
>>> jwt.decode(encoded, encryption_secret, algorithms=[algo])
{'hello': 'payload'}
위에서 인코딩할 때 encryption_secret = 'secret'부분을 볼 수 있는데, 여기서 secret라는 문자열은 너무 단순하므로 실제 상용서비스에서는 복잡한 값을 사용하도록 한다.
회원가입 암호화
우선 이전 버전의 signup()은 아래와 같다.
def sign_up():
        new_user        = request.json  # request는 endpoint에 전송된 해당 HTTP요청을 통해 전송된 json데이터를 파이썬 딕셔너리로 변환해준다.
        new_user_id = app.database.execute(text("""
        INSERT INTO users(
            name,
            email,
            profile,
            hashed_password
        ) VALUES(
            :name,
            :email,
            :profile,
            :password
        )
        """), new_user).lastrowid

        row = current_app.database.execute(text("""
            SELECT
                id,
                name,
                email,
                profile
            FROM users
            WHERE id = :user_id
        """),{
            'user_id': new_user_id
        }).fetchone()

        created_user = {
            'id'      : row['id'],
            'name'    : row['name'],
            'email'   : row['email'],
            'profile' : row['profile']
        } if row else None

        return jsonify(created_user) # dictionary를 json으로 변환해줌.
자 잠깐 여기서 전체 소스 한번 확인하시고 특히 sign_up를 두 개의 함수로 나누었다.
from flask import Flask, jsonify, request, current_app
from flask.json import JSONEncoder
from sqlalchemy import create_engine, text

class CustomJSONEncoder(JSONEncoder):
    def default(self, obj): #default method를 over write 함.
        if isinstance(obj, set): #set타입이라면 list로 변환한다.
            return list(obj)
        return JSONEncoder.default(self, obj)


def insert_user(user):
    return current_app.database.execute(text("""
        INSERT INTO users(
            name,
            email,
            profile,
            hashed_password
        ) VALUES(
            :name,
            :email,
            :profile,
            :password
        )
        """), user).lastrowid

def get_user(user_id):
    user = current_app.database.execute(text("""
        SELECT
            id,
            name,
            email,
            profile
        FROM users
        WHERE id = :user_id
    """),{
        'user_id': user_id
    }).fetchone()

    #user_id를 사용하고
    #아래에서는 user를 체크함.

    return {
        'id'      : user['id'],
        'name'    : user['name'],
        'email'   : user['email'],
        'profile' : user['profile']
    } if user else None
    # created_user = {
    #     'id'      : row['id'],
    #     'name'    : row['name'],
    #     'email'   : row['email'],
    #     'profile' : row['profile']
    # } if row else None

    # return created_user

def create_app(test_config = None): #flask가 자동으로 이 함수를 인식함. 또한 test_config라는 인자를 받아 유닛테스트때 사용.
    app = Flask(__name__)
    app.json_encoder = CustomJSONEncoder
    if test_config is None:
        app.config.from_pyfile("config.py") #unittest 하는 경우가 아니라면 config.py를 읽는다.
    else:
        app.config.update(test_config)

    database = create_engine(app.config['DB_URL'], encoding = 'utf-8', max_overflow = 0) #sqlAlchemy사용하는 부분임.
    app.database = database #생성한 Engine 객체를 플라스크 객체에 저장함. 이로써 현재 .py파일에서 데이터 베이스 접근이 가능함.

    # 모든 데코레이터 & 함수들은  create_app 내부에 정의함 ( 이하 )
    @app.route("/ping", methods = ['GET'])
    def ping():
        return "pong"

    # 회원 가입 데코레이터 부분 ------------------------------------
    @app.route("/sign-up", methods=['POST']) #포스트 임을 주의
    def sign_up():
        new_user    = request.json
        new_user_id = insert_user(new_user)
        new_user    = get_user(new_user_id)

        return jsonify(new_user)

    # 트윗 저장소를 만듬 ------------------------------------

    @app.route("/tweet", methods=['POST'])
    def tweet():
        user_tweet = request.json
        tweet_content = user_tweet['tweet']

        if len(tweet_content) > 300:
            return "300자 초과했어요", 400


        app.database.execute(text("""
        INSERT INTO tweets(
            user_id,
            tweet
        ) VALUES(
            :id,
            :tweet
        )
        """), user_tweet) #sql 문을 통해 insert될 트윗 데이터는 HTTP요청을 통해 전송된 JSON데이터 그대로 사용함.
        return '', 200

    # Timeline 을 보여줌 ------------------------------------

    @app.route('/timeline/<int:user_id>',methods = ['GET'])
    def timeline(user_id):
        rows = app.database.execute(text("""
            SELECT
                t.user_id,
                t.tweet
            FROM tweets t
            LEFT JOIN users_follow_list ufl ON ufl.user_id = :user_id
            WHERE t.user_id = :user_id
            OR t.user_id = ufl.follow_user_id
        """), {
            'user_id' : user_id
        }).fetchall()

        timeline = [{
            'user_id': row['user_id'],
            'timeline': row['tweet']
        } for row in rows]

        return jsonify({
            'user_id': user_id,
            'timeline': timeline
        })
    # 명령 : http -v GET http://localhost:5000/timeline/1

    @app.route('/follow', methods =['POST'])
    def follow():
        jsonContent = request.json
        app.database.execute(text("""
            INSERT INTO users_follow_list(
                user_id,
                follow_user_id
            ) VALUES(
                :id,
                :follow
            )

        """), jsonContent)
        return '', 200
    # 명령 $ http -v POST http://localhost:5000/follow id=1 follow=2

    return app #end of create_app
자 이제 정말로 signup 함수를 수정해보자. 정확히는 sign_up에서 호출하는 insert_user()를 수정한다.
def sign_up():
    new_user    = request.json
    new_user_id = insert_user(new_user)
    new_user    = get_user(new_user_id)

    return jsonify(new_user)
#####################################################
def insert_user(user):

    new_user = user  # request는 endpoint에 전송된 해당 HTTP요청을 통해 전송된 json데이터를 파이썬 딕셔너리로 변환해준다.
    new_user['password'] = bcrypt.hashpw(
      new_user['password'].encode('UTF-8'),
       bcrypt.gensalt()
    )

    return current_app.database.execute(text("""
        INSERT INTO users(
            name,
            email,
            profile,
            hashed_password
        ) VALUES(
            :name,
            :email,
            :profile,
            :password
        )
    """), new_user).lastrowid
그리고나서 login함수도 추가한다.
@app.route('/login',methods=['POST'])
def login():
    credential = request.json
    email = credential['email']
    password = credential['password']

    user_credential = database.execute(text("""
        SELECT
            id,
            hashed_password
        FROM users
        WHERE email = :email
    """),{'email':email}).fetchone()

    if user_credential and bcrypt.checkpw(password.encode('UTF-8'),user_credential['hashed_password'].encode('UTF-8')):
        user_id = user_credential['id']
        payload = {
            'user_id' : user_id,
            'exp'     : datetime.utcnow() + timedelta(seconds = 60 * 60 * 24)
        }
        token = jwt.encode(payload, app.config['JWT_SECRET_KEY'], 'HS256')
        return jsonify({
            'access_token' : token.decode('UTF-8')
        })
    else:
        return '', 401
아 여기서 계속 아래 에러가 발생했음.
$ $ http -v POST http://localhost:5000/login email=strawbx123@gmail.com password=test1234
.
.
token = jwt.encode(payload, app.config['JWT_SECRET_KEY'], 'HS256')
KeyError: 'JWT_SECRET_KEY'
에러의 내용을 보면 JWT_SECRET_KEY가 존재하지 않는 다는 내용으로 단순하다.
config.py에 내용을 적어주면 해결된다.
db = {
    .
    .
}
DB_URL = f"mys.....

JWT_SECRET_KEY        = 'HELLO_MY_SECRET'
다시 로그인 해보자
$ http -v POST http://localhost:5000/login email=strawbx123@gmail.com password=test1234                               [16:17:59]
POST /login HTTP/1.1
Accept: application/json, */*
Accept-Encoding: gzip, deflate
Connection: keep-alive
Content-Length: 57
Content-Type: application/json
Host: localhost:5000
User-Agent: HTTPie/1.0.2

{
    "email": "strawbx123@gmail.com",
    "password": "test1234"
}

HTTP/1.0 200 OK
Content-Length: 148
Content-Type: application/json
Date: Wed, 05 Jun 2019 07:18:13 GMT
Server: Werkzeug/0.15.4 Python/3.7.3

{
    "access_token": "eyJ0eXAiOiJKV1QiLCJhbGciOiJIUzI1NiJ9.eyJ1c2VyX2lkIjoxNiwiZXhwIjoxNTU5ODA1NDkzfQ.D8PuPcJgswTI5nQyuLlezAWPbqameZ4LhhB7KsPwtxM"
}
휴. 이번에는 성공이다.ㅜㅜ
자 여기서 잠깐 decoratorㅇㅔ 대해 배워보자.
docorator라는 것은 함수를 리턴하는 함수를 말한다. 파이썬에서는 wraps라는 것을 사용하면 된다.
#decorator example

from functools import wraps

def myDecorator(f):
    @wraps(f)
    def decoreatedInnerFunc(*args, **kwargs):
        print("Decorated function")
        return f(*args, **kwargs)

    return decoreatedInnerFunc

@myDecorator
def func():
    print('this is just func')

func()

##결과
# Decorated function
# this is frunc just func
인증 적용하기
인증이 필요한 함수들 위에 모두 decorator를 써주면, 각 함수들은 반드시 로그인이 되어 있어야만 작동하게 된다.
#########################################################
#       Decorators
#########################################################
def login_required(f):
    @wraps(f)
    def decorated_function(*args, **kwargs):
        access_token = request.headers.get('Authorization')
        if access_token is not None:
            try:
                payload = jwt.decode(access_token, current_app.config['JWT_SECRET_KEY'], 'HS256')
            except jwt.InvalidTokenError:
                 payload = None

            if payload is None: return Response(status=401)

            user_id   = payload['user_id']
            g.user_id = user_id
            g.user    = get_user(user_id) if user_id else None
        else:
            return Response(status = 401)

        return f(*args, **kwargs)
    return decorated_function
적용하기
각 함수에 적용하기 위해서는 아래 처럼 하면 된다.
기존코드
@app.route("/tweet", methods=['POST'])

def tweet():
    user_tweet = request.json
    tweet_content = user_tweet['tweet']
        .
        .
수정된 코드
@app.route("/tweet", methods=['POST'])
@login_required  #이게 추가됨
def tweet():
    user_tweet = request.json
    user_tweet['id'] = g.user_id
    tweet_content = user_tweet['tweet']

    insert_tweet(user_tweet)
@login_required가 추가된 것을 볼 수 있다.
자 이제 무심코 아래처럼 해보면 404가 떨어짐을 볼 수 있다
$ http -v POST http://localhost:5000/tweet id=1 tweet="Oh my Helloooo is upcoming22222"                                [16:50:50]
POST /tweet HTTP/1.1
Accept: application/json, */*
Accept-Encoding: gzip, deflate
Connection: keep-alive
Content-Length: 54
Content-Type: application/json
Host: localhost:5000
User-Agent: HTTPie/1.0.2

{
    "id": "1",
    "tweet": "Oh my Helloooo is upcoming22222"
}

HTTP/1.0 401 UNAUTHORIZED
Content-Length: 0
Content-Type: text/html; charset=utf-8
Date: Wed, 05 Jun 2019 07:51:23 GMT
Server: Werkzeug/0.15.4 Python/3.7.3
자 여기서 이제
def tweet():
        user_tweet = request.json
        tweet_content = user_tweet['tweet']
를 아래 처럼 수정하자
로그인해서 tweet()날리는 절차를 보자
아래 순서로 해야 한다.
- 먼저 로그인함수를 실행하면 access_token이 표시된다.
$ http -v POST http://localhost:5000/login email=strawbx123@gmail.com password=test1234
.
.
{
 "access_token": "eyJ0eXAiOiJKV1QiLCJhbGciOiJIUzI1NiJ9.eyJ1c2VyX2lkIjoxNiwiZXhwIjoxNTU5ODA4ODAwfQ.QmDESSwtfLmJHXfIuDBXO_sBw780r0j4oMklcv_H5hg"
}
2.AccessToken을 사용해서 tweet()를 호출해 보자. 아래 처럼 해야 잘 된다
$ http -v POST http://localhost:5000/tweet tweet="halo world" "Authorization:eyJ0eXAiOiJKV1QiLCJhbGciOiJIUzI1NiJ9.eyJ1c2VyX2lkIjoxNiwiZXhwIjoxNTU5ODA4ODAwfQ.QmDESSwtfLmJHXfIuDBXO_sBw780r0j4oMklcv_H5hg"
POST /tweet HTTP/1.1
Accept: application/json, */*
Accept-Encoding: gzip, deflate
Authorization: eyJ0eXAiOiJKV1QiLCJhbGciOiJIUzI1NiJ9.eyJ1c2VyX2lkIjoxNiwiZXhwIjoxNTU5ODA4ODAwfQ.QmDESSwtfLmJHXfIuDBXO_sBw780r0j4oMklcv_H5hg
Connection: keep-alive
Content-Length: 23
Content-Type: application/json
Host: localhost:5000
User-Agent: HTTPie/1.0.2

{
    "tweet": "halo world"
}

HTTP/1.0 200 OK
Content-Length: 0
Content-Type: text/html; charset=utf-8
Date: Wed, 05 Jun 2019 08:14:33 GMT
Server: Werkzeug/0.15.4 Python/3.7.3
참고: 이때 access_token를 빠뜨리면 아래 처럼 하면 401 에러가 발생한다
$ http -v POST http://localhost:5000/tweet tweet="halo world"                                                         [17:13:20]
POST /tweet HTTP/1.1
Accept: application/json, */*
Accept-Encoding: gzip, deflate
Connection: keep-alive
Content-Length: 23
Content-Type: application/json
Host: localhost:5000
User-Agent: HTTPie/1.0.2

{
    "tweet": "halo world"
}

HTTP/1.0 401 UNAUTHORIZED
Content-Length: 0
Content-Type: text/html; charset=utf-8
Date: Wed, 05 Jun 2019 08:13:26 GMT
Server: Werkzeug/0.15.4 Python/3.7.3
또한 더이상 tweet함수 호출할 때 id를 적지 않아도 된다. 이에 대한 처리는 user_tweet['id'] = g.user_id가 담당하고 있다.
# 트윗 저장소를 만듬 ------------------------------------

    @app.route("/tweet", methods=['POST'])
    @login_required
    def tweet():
        user_tweet = request.json
        user_tweet['id'] = g.user_id
        tweet_content = user_tweet['tweet']

        if len(tweet_content) > 300:
            return "300자 초과했어요", 400
        insert_tweet(user_tweet)

        return '', 200
로그인을 위해서 frontend코드를 사용하자.
다음 url로 접속한다. http://localhost:8000/signup.html
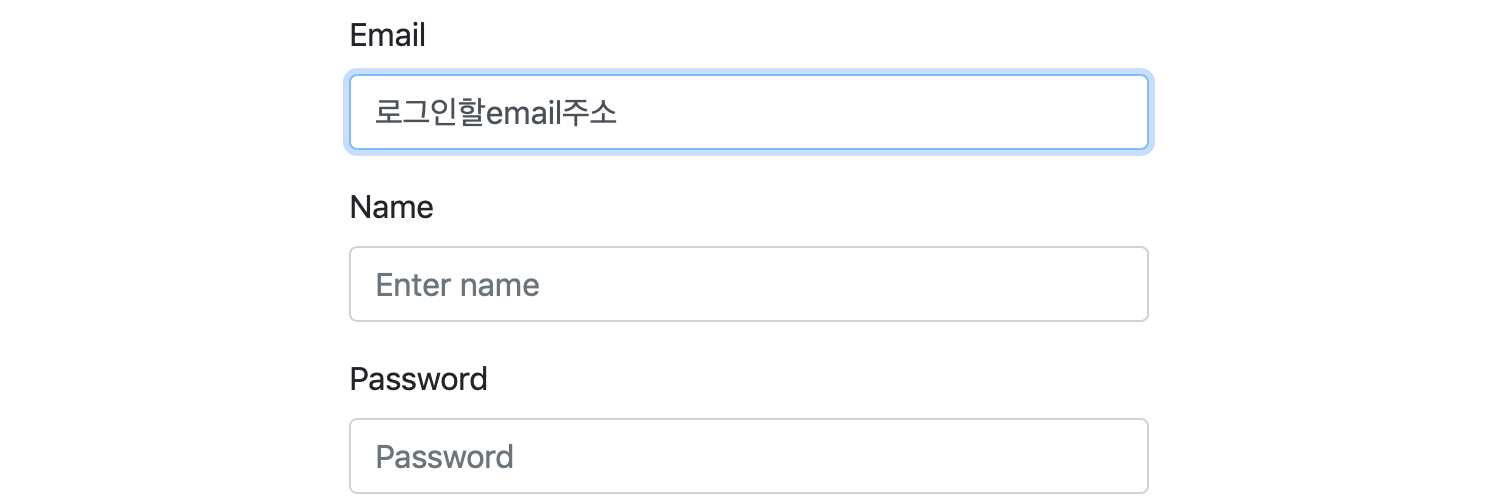
그러면 이후 login화면으로 이동한다.
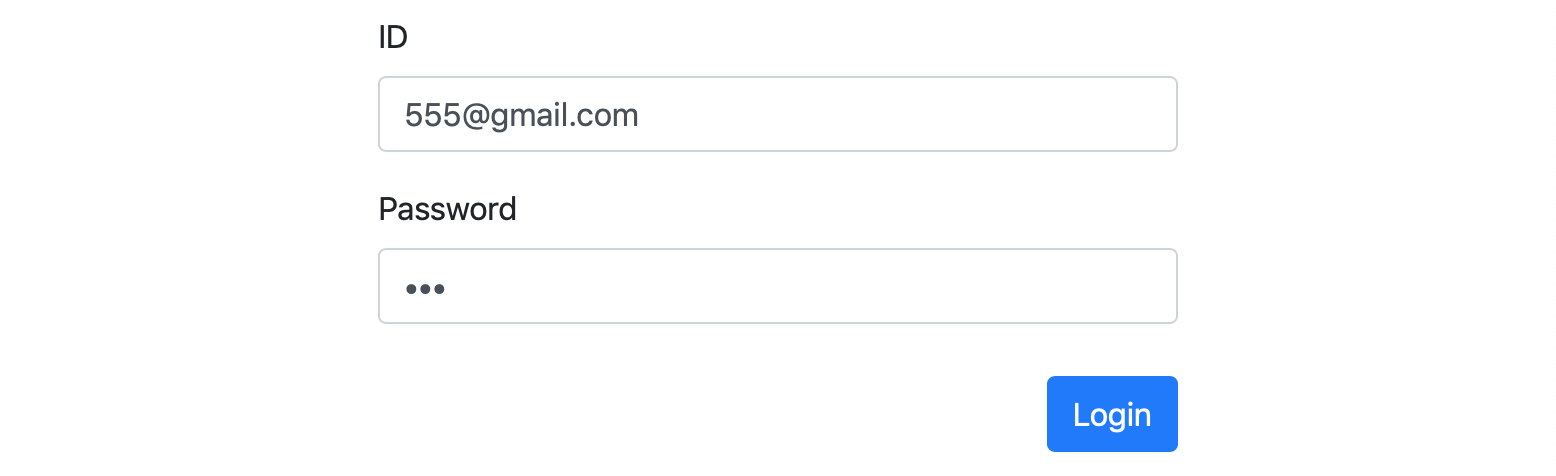
로그인 성공한 모습

이상

 Eddie Kwon - Development log for ML, iOS